Rear Struts overhaul.
I recently decided to remove my rear struts and overhaul them.Although they werent knocking they were sticking slightly and would jump up a small amount sometimes as if someone was getting out the car.Micktype WR1 sent me a link from scoobynet which outlines the removal and refitting sequence quite well.
After viewing this and various other threads and links it was time to get stuck in.
Get the car jacked up using a good quality trolley jack under the rear diff.When its high enough pop some axle stands somewhere secure under the body.I also put some wedge shaped chocs under the front wheels fro added security.
Before starting the rear seats must be removed.This is a simple process,two blots hold the bottom seat in position located in the footwells and after you remove this four more bolts hold the back part of the seat on along where the seat belts straps are bolted on.Seat is then hooked on to clips at the rear which you have to push the seat over to remove.When both are removed you can then gain access to top mounting points for both struts.
There are 3 nuts which secure the top of the struts to the car body,these are a pig to get at and it takes ages to unscrew them as you can only turn the ratchet in small increments on a couple of them.Unscrew all of them and leave the easiest one to get at right on the final threads so that the strut doesnt drop to the ground after you have removed the bottom fixing bolts.
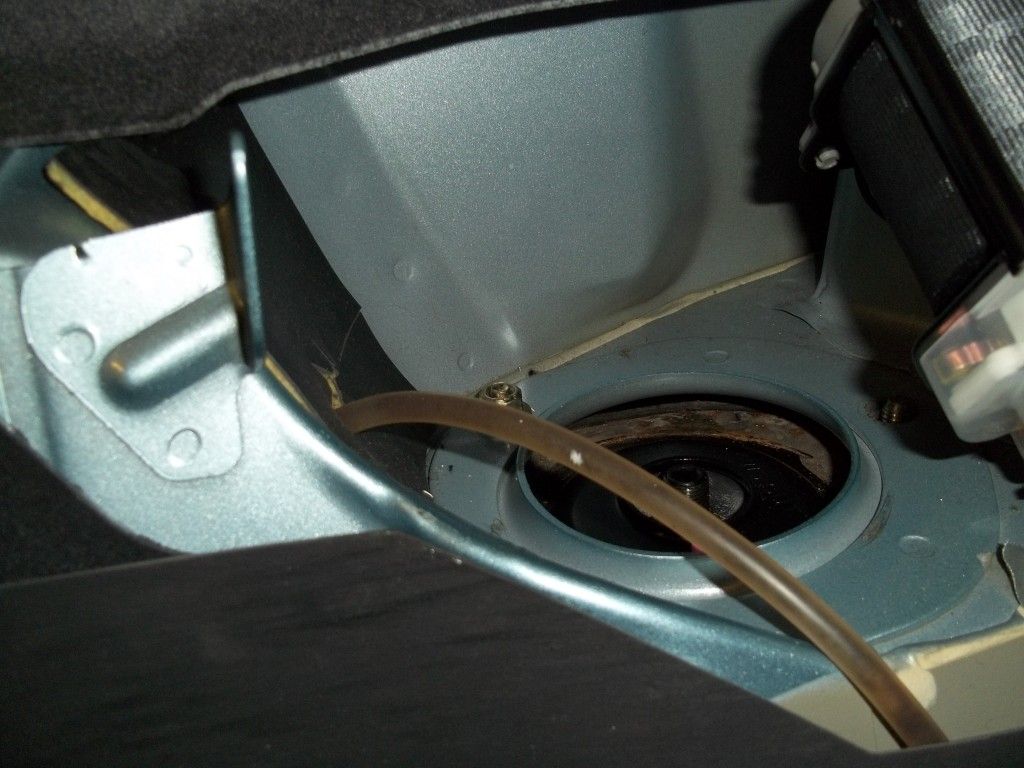
I have read that the next step is to attach some coil spring compressors to the springs.I found that my hubs dropped down sufficiently enough to allow the struts to come out quite easily without compressing the springs.
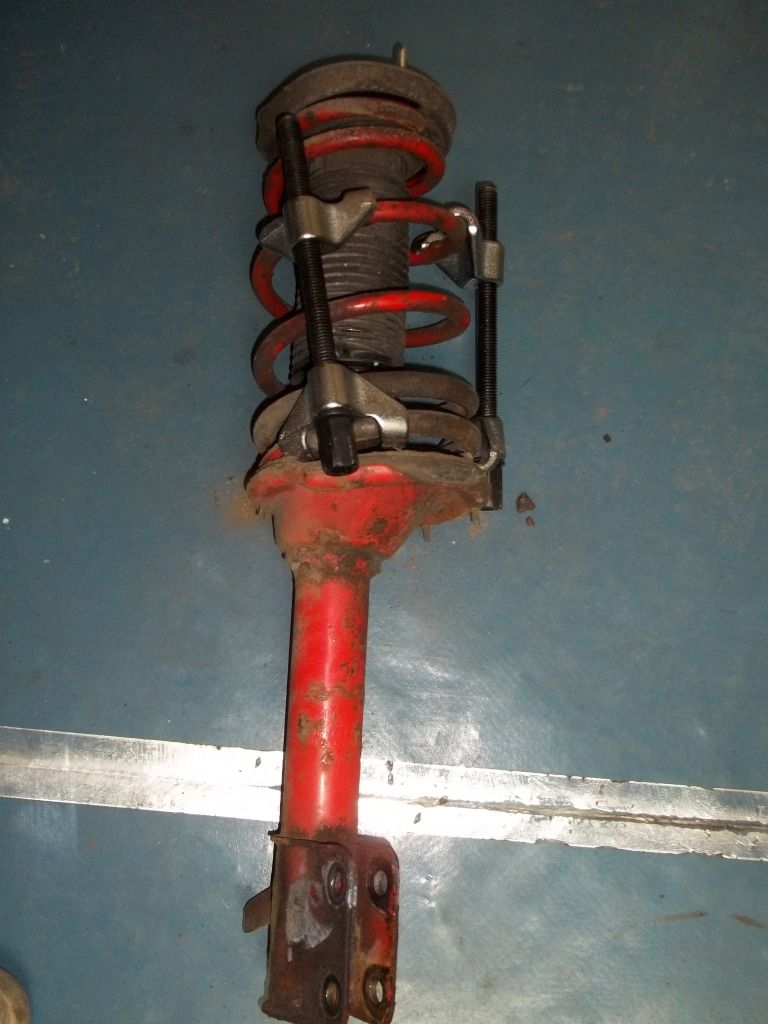
Above is the strut ready for removal.
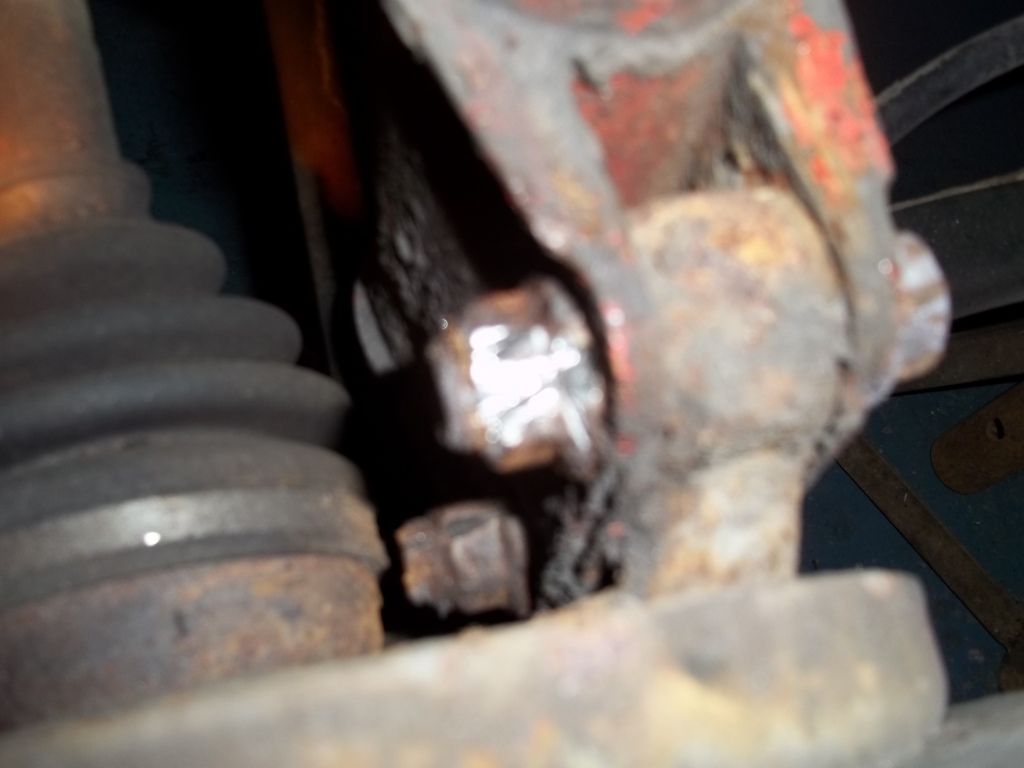
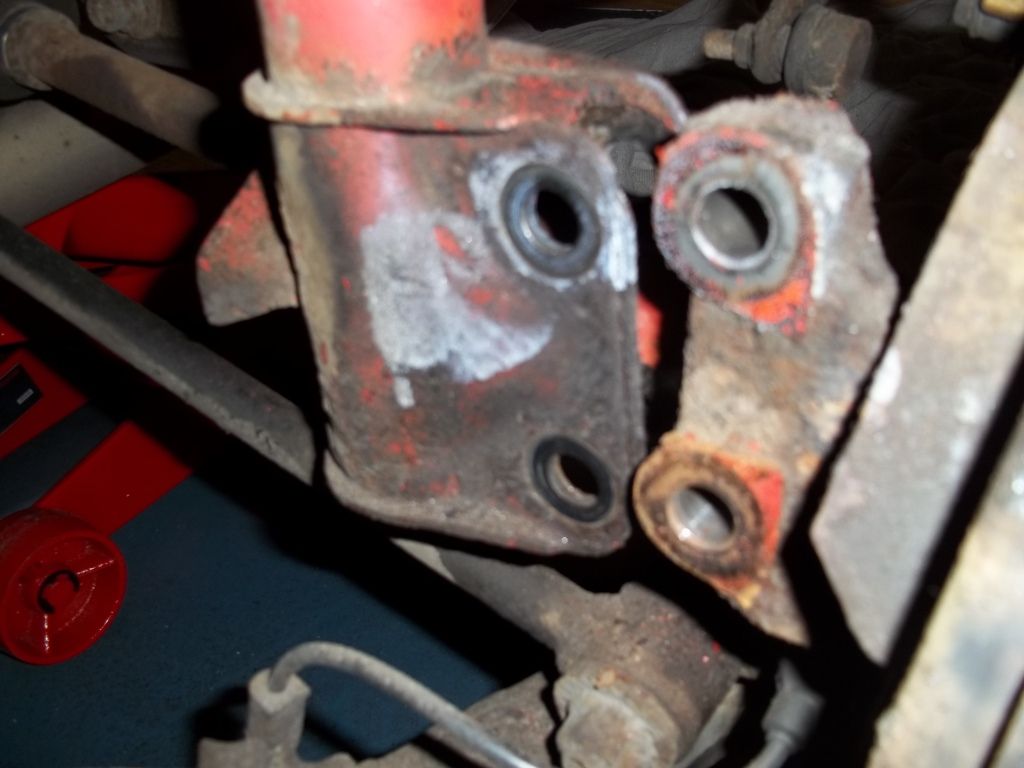
If you have ever taken the time to look behind the wheel hub you might have noticed that the bolts holding the strut to the hub are in a particularly inaccesable position for removing them.I found that the bolts on mine were rusted solid and wouldn,t budge.Tried large impact wrench,heating them up and soaking in penetrating fluid ,all to no avail.
The only way to remove them was to make a slit in the nuts.This in it self wasnt easy because you just cant get a decent cutting disc in there due to space constraints.My answer was to break out the Dremel.I ended ordering some special cutting discs which took a few days to arrive.They are only 0.75mm thick and 50mm in dia,perfect for this job.As soon as I had put a slit in each nut and gave them a whack with a cold chisel to finally split the nut they came out easily.
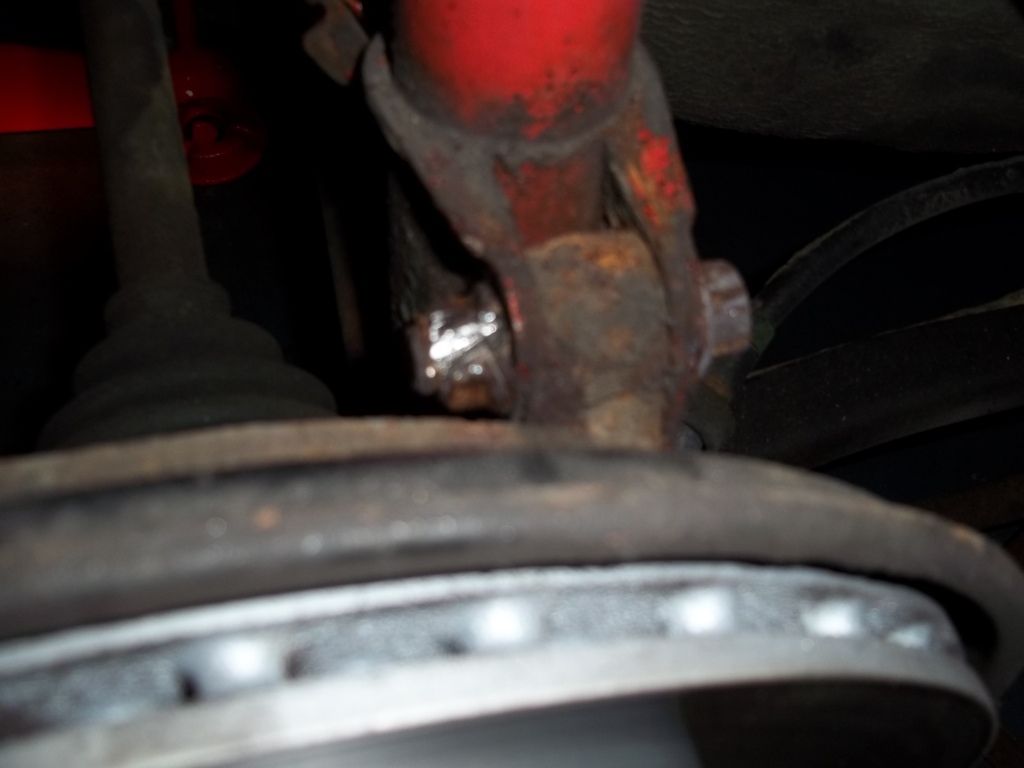
Couldnt get a decent enough picture of the bottom bolt only the top one.
Bolts removed and strut free from hub.
Remember the top mounting nut is stopping the strut from falling out after you have seperated the strut from the hub.Take the weight of the strut in one hand then reach into the car with the other and unscrew the top nut.The strut will now drop down and you can remove it through the wheel arch.
Strut is now ready for dissasembly.
Very important!!At this stage you must now use the coil spring compressors as shown.Coils could do some serious damage to you or even your car if you attempt to dissasemble without them.
After springs are compressed (only slightly is enough) you will note that there are two nuts which hold the whole thing together.One on the top and one on the bottom.Remove the top one first which I think is a 17mm socket.You might find that the damper behind the black plastic dust shield may try to turn when you attempt this.
Mine did.I put a rag round the damper to prevent scratching it and clamped it with some large grips.This stopped the damper from spinning and the nut came off easily.You can now seperate the spring from the strut.The top mount comes off with the black dust shield attached to it.It is also now safe to remove the coil spring compressors from the spring.
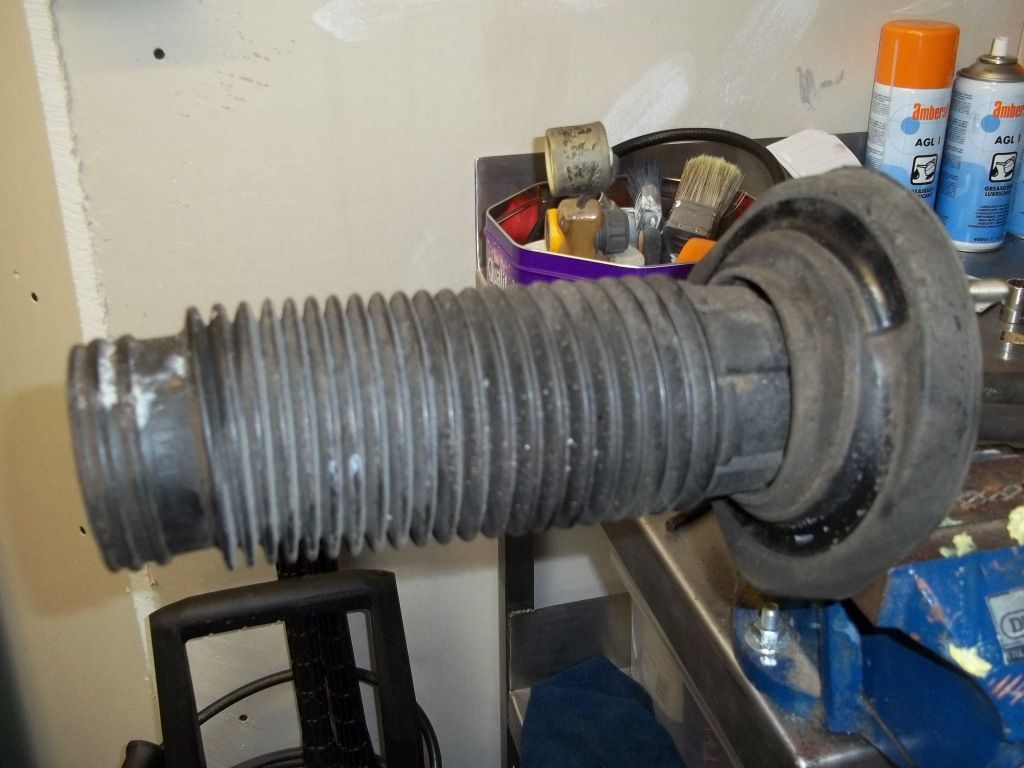
The damper is now only attached to the strut with a 14mm nut at the bottom.Again my nuts were rusted a little and wouldnt come off.The problem is that the bottom of the damper has a shouldered collar on the stud and after you have undone the nut a little it to spins in the strut housing and if you nut is rusted it wont come off.My solution was to make a cut in the stud a couple of millimetres deep so you can hold it with a screwdriver whilst turning the nut with a spanner.Penetrating fluid wouldnt go amiss.Once this is done the damper can be pulled out of the body of the strut.
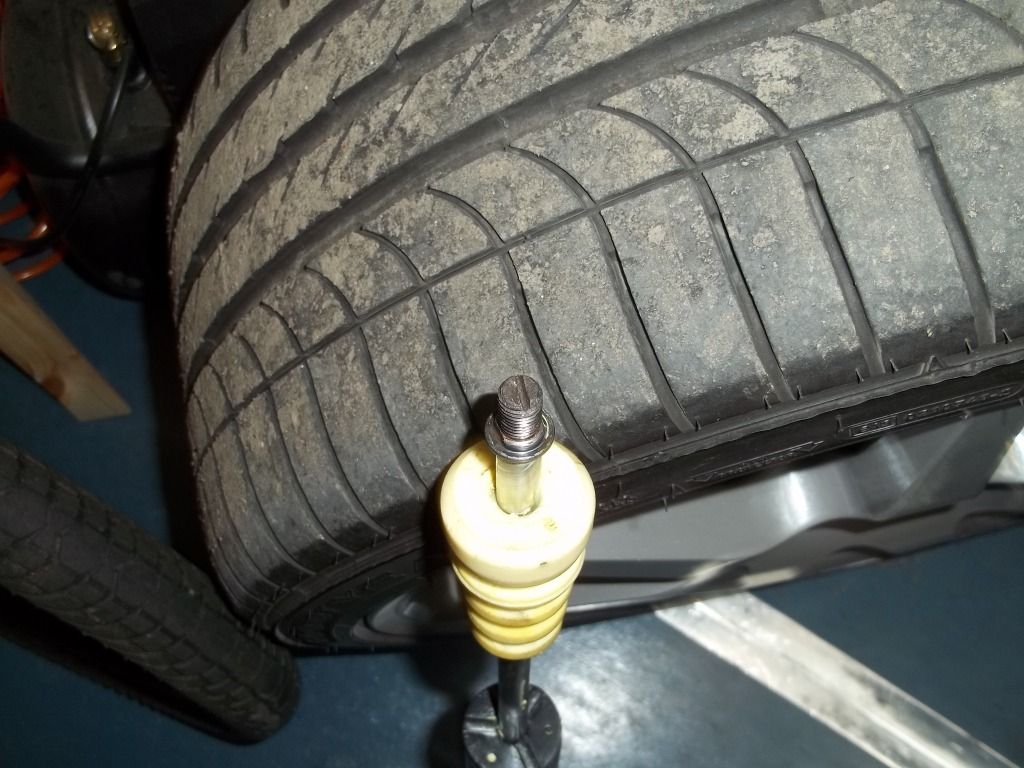
For some reason I couldnt get pictures of down inside the strut but you will find that Subaru will have put a yellow grease in there.The grease in mine was a strange consistency,hard to describe.Bit like hard butter.Not greasy at all and you will immediately see why they stick or knock.
At this stage you need to remove the crappy Subaru grease.Best tool for this is one of your missus's small flexible spatula's.After you have removed the majority spray some WD40 or similar all around the inside and poke a clean rag in there to remove all the remnants.
I did some research into the best types of grease to put back in the struts and concluded a good LP lithium based bearing grease is good.I used Castrol High temp bearing grease for mine.
The grease needs to go between the two internal shoulders inside the strut.One is directly below the top seal,about 15mm long and the nesxt below that about 75mm long.I used a steel 12" ruler to apply the grease in to the shoulders. and smoothed it off reasonably neatly before re inserting the damper.Dont suppose you have to be too neat about this but I took my time and ensured there wern't any air pockets or gaps in the grease.In total I reckon I put about 2 golf balls worth of grease back in there.
Taking care not to damage the seal slide the damper back in the strut until the threaded stud at the bottom pokes out and put the nut back on a tighten it up.You should notice hoe nicely the damper moves up and down in the strut now.
Put the spring compressors back on the spring and you can start to re assemble everything.Again when I tried to tighten up the top nut on the strut the damper spun.Just hold again with some grips and the nut tightens up easily.Remove the coil spring compressors.
All that left to do is push the strut back up inside the wheel well and put one of the top nuts on loosely so that the strut is hanging there on its own and re attach the bottom of the strut to the rear of the hub.
Of course I needed to get new lower mounting bolts for mine.After going to my local Dealer they told me that they would cost £6 ea.Theres 4 of them,so after picking myself up from the floor I decided to source my own bolts.Another headache as they are M14 with a 1.25mm pitch and not easy to get hold of ,especially if you want them plated.Finally tracked some down and bought a minimum supply of 20 with nuts for £8.Happy with that as I can use the new ones for the fronts if I decide to remove them.
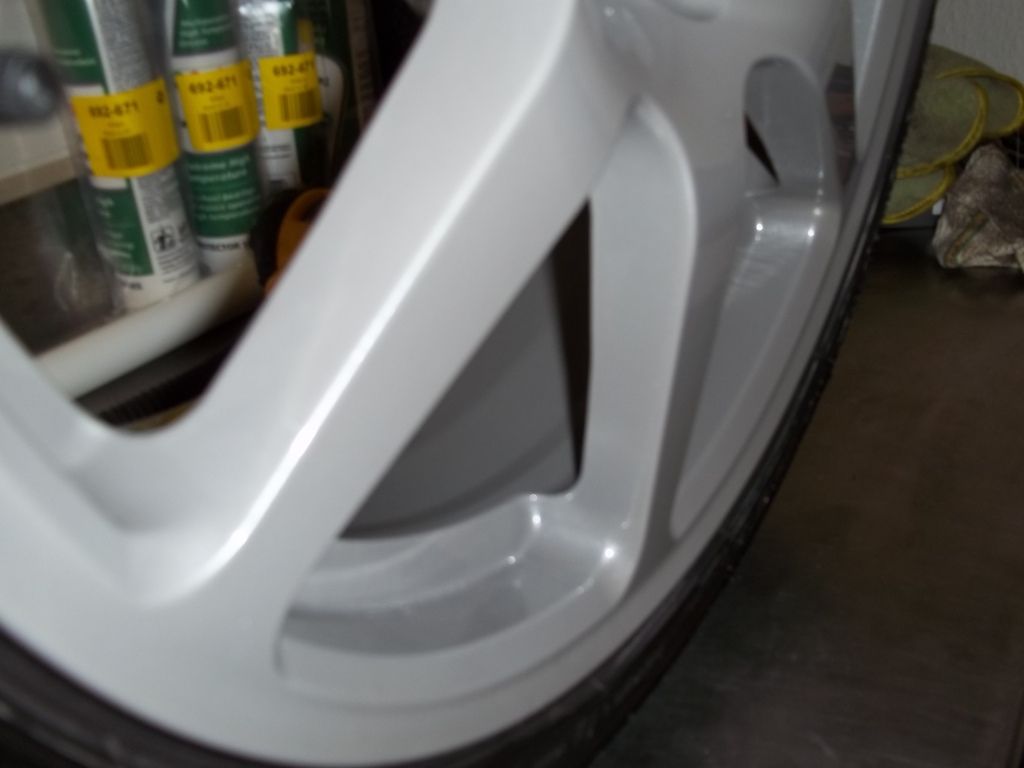
When I got to the stripping down stage I decided I couldn't bear to put them back on without getting the strut housings and spring powder coated.I have an account through my business with a local powder coaters so this was a no brainer.Got the struts done in white and the springs in yellow.Not sure why I chose those colours but I am happy with them.
So after putting everything back together I couldn't wait to go out for a test drive.I noticed a difference as soon as I sat in the drivers seat and started the engine,it definately felt better( or was I dreaming).Anyway on the road the back end feels like I would have expected it to when it was new.No sticking at all and feels plush even for a car with stiff suspension.
In conclusion anyone who is pissed off with there knocking or sticking rear struts should have a go at this before biting the bullet and going down the after market route.Its dirt cheap and apart from being a bit of a ball ache its very rewarding when you complete it and put it back on the road.The key is to plan everything in advance make sure you have the right tools and the rest is easy,even for non mechanically minded folk.
I hope this is of use to some people and would appreciate any feedback.
Carl.
PS I took a few more photos whilst messing around with the camera.

After viewing this and various other threads and links it was time to get stuck in.
Get the car jacked up using a good quality trolley jack under the rear diff.When its high enough pop some axle stands somewhere secure under the body.I also put some wedge shaped chocs under the front wheels fro added security.
Before starting the rear seats must be removed.This is a simple process,two blots hold the bottom seat in position located in the footwells and after you remove this four more bolts hold the back part of the seat on along where the seat belts straps are bolted on.Seat is then hooked on to clips at the rear which you have to push the seat over to remove.When both are removed you can then gain access to top mounting points for both struts.
There are 3 nuts which secure the top of the struts to the car body,these are a pig to get at and it takes ages to unscrew them as you can only turn the ratchet in small increments on a couple of them.Unscrew all of them and leave the easiest one to get at right on the final threads so that the strut doesnt drop to the ground after you have removed the bottom fixing bolts.
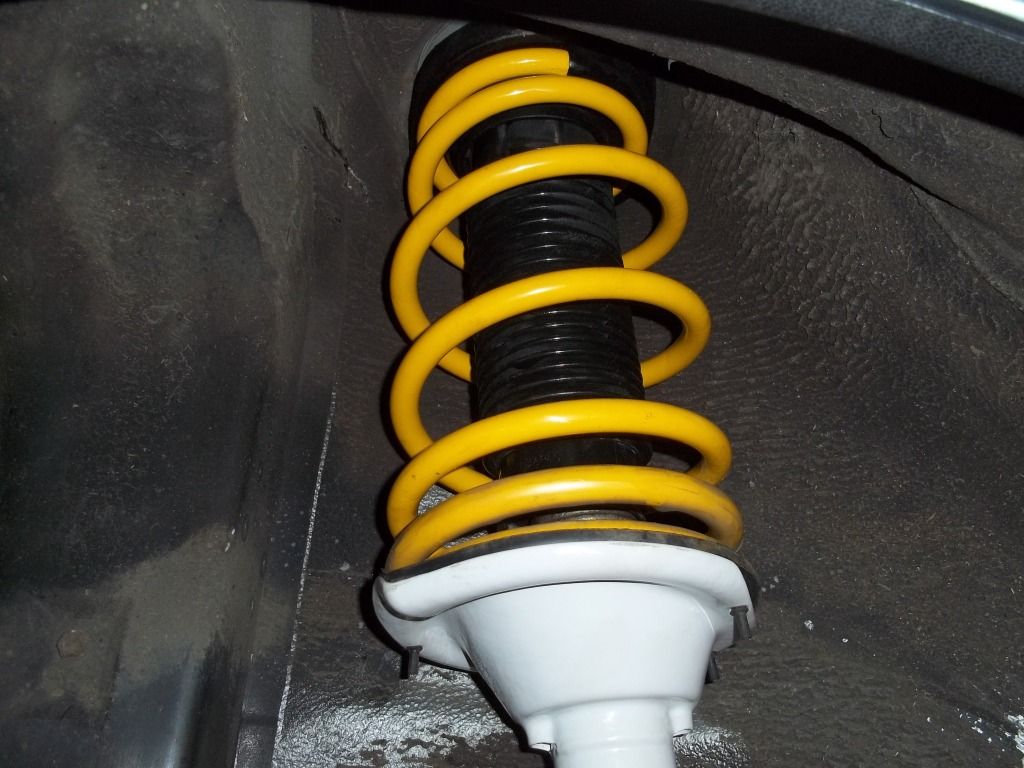
I have read that the next step is to attach some coil spring compressors to the springs.I found that my hubs dropped down sufficiently enough to allow the struts to come out quite easily without compressing the springs.
Above is the strut ready for removal.
If you have ever taken the time to look behind the wheel hub you might have noticed that the bolts holding the strut to the hub are in a particularly inaccesable position for removing them.I found that the bolts on mine were rusted solid and wouldn,t budge.Tried large impact wrench,heating them up and soaking in penetrating fluid ,all to no avail.
The only way to remove them was to make a slit in the nuts.This in it self wasnt easy because you just cant get a decent cutting disc in there due to space constraints.My answer was to break out the Dremel.I ended ordering some special cutting discs which took a few days to arrive.They are only 0.75mm thick and 50mm in dia,perfect for this job.As soon as I had put a slit in each nut and gave them a whack with a cold chisel to finally split the nut they came out easily.
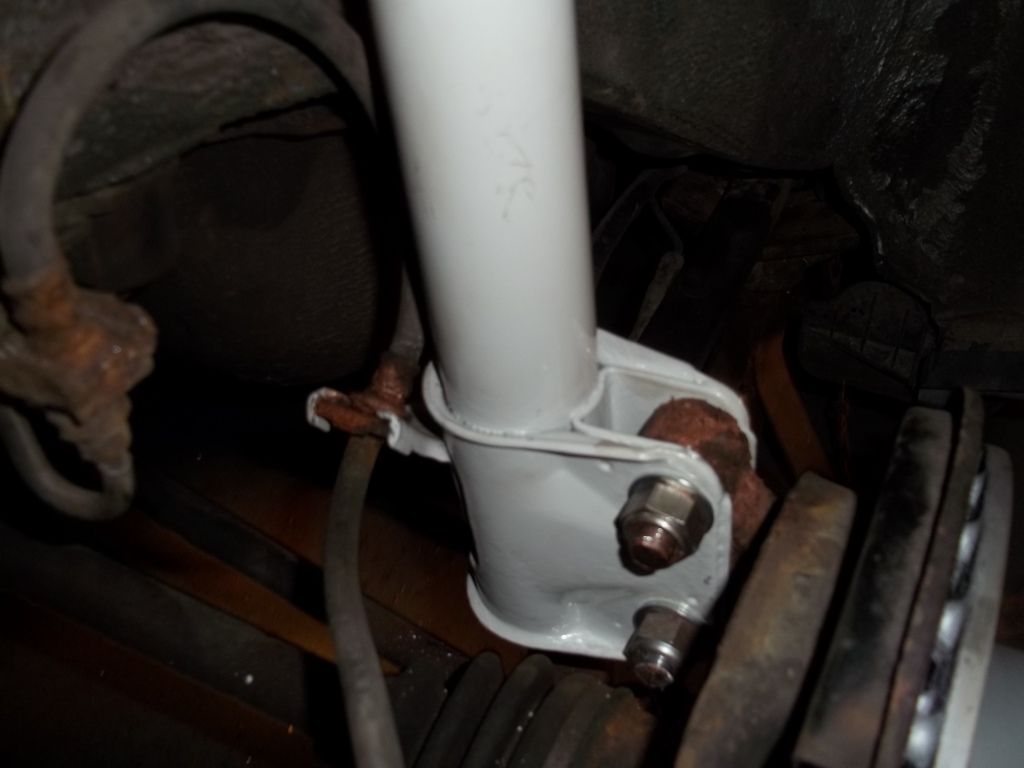
Couldnt get a decent enough picture of the bottom bolt only the top one.
Bolts removed and strut free from hub.
Remember the top mounting nut is stopping the strut from falling out after you have seperated the strut from the hub.Take the weight of the strut in one hand then reach into the car with the other and unscrew the top nut.The strut will now drop down and you can remove it through the wheel arch.
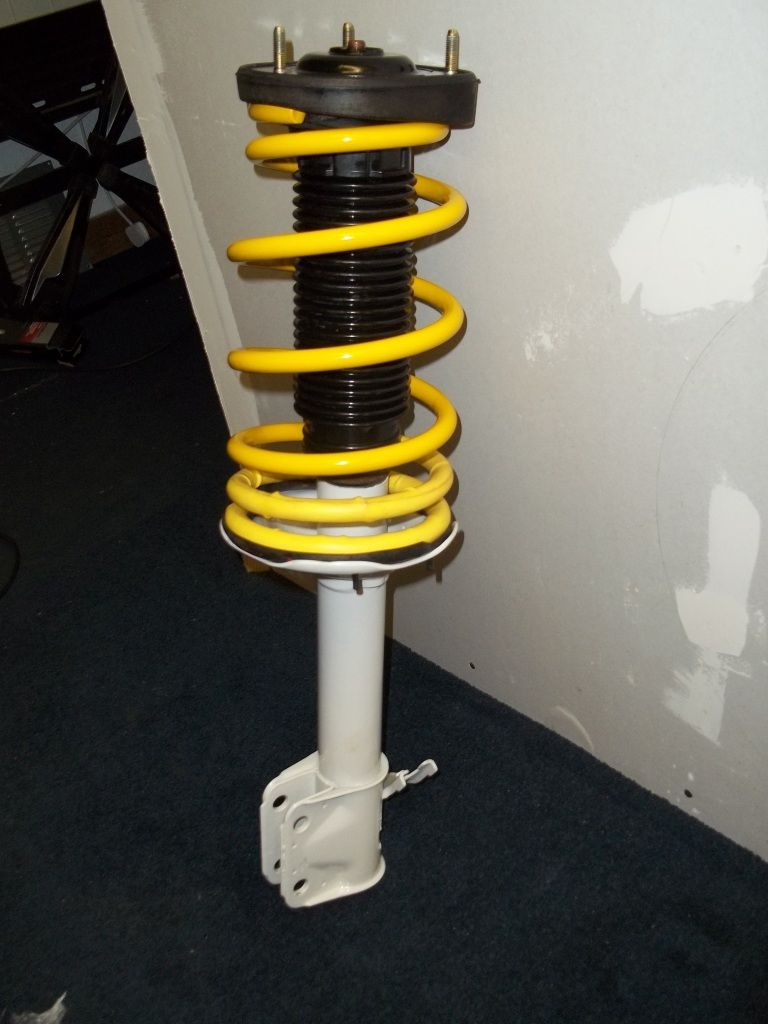
Strut is now ready for dissasembly.
Very important!!At this stage you must now use the coil spring compressors as shown.Coils could do some serious damage to you or even your car if you attempt to dissasemble without them.
After springs are compressed (only slightly is enough) you will note that there are two nuts which hold the whole thing together.One on the top and one on the bottom.Remove the top one first which I think is a 17mm socket.You might find that the damper behind the black plastic dust shield may try to turn when you attempt this.
Mine did.I put a rag round the damper to prevent scratching it and clamped it with some large grips.This stopped the damper from spinning and the nut came off easily.You can now seperate the spring from the strut.The top mount comes off with the black dust shield attached to it.It is also now safe to remove the coil spring compressors from the spring.
The damper is now only attached to the strut with a 14mm nut at the bottom.Again my nuts were rusted a little and wouldnt come off.The problem is that the bottom of the damper has a shouldered collar on the stud and after you have undone the nut a little it to spins in the strut housing and if you nut is rusted it wont come off.My solution was to make a cut in the stud a couple of millimetres deep so you can hold it with a screwdriver whilst turning the nut with a spanner.Penetrating fluid wouldnt go amiss.Once this is done the damper can be pulled out of the body of the strut.
For some reason I couldnt get pictures of down inside the strut but you will find that Subaru will have put a yellow grease in there.The grease in mine was a strange consistency,hard to describe.Bit like hard butter.Not greasy at all and you will immediately see why they stick or knock.
At this stage you need to remove the crappy Subaru grease.Best tool for this is one of your missus's small flexible spatula's.After you have removed the majority spray some WD40 or similar all around the inside and poke a clean rag in there to remove all the remnants.
I did some research into the best types of grease to put back in the struts and concluded a good LP lithium based bearing grease is good.I used Castrol High temp bearing grease for mine.
The grease needs to go between the two internal shoulders inside the strut.One is directly below the top seal,about 15mm long and the nesxt below that about 75mm long.I used a steel 12" ruler to apply the grease in to the shoulders. and smoothed it off reasonably neatly before re inserting the damper.Dont suppose you have to be too neat about this but I took my time and ensured there wern't any air pockets or gaps in the grease.In total I reckon I put about 2 golf balls worth of grease back in there.
Taking care not to damage the seal slide the damper back in the strut until the threaded stud at the bottom pokes out and put the nut back on a tighten it up.You should notice hoe nicely the damper moves up and down in the strut now.
Put the spring compressors back on the spring and you can start to re assemble everything.Again when I tried to tighten up the top nut on the strut the damper spun.Just hold again with some grips and the nut tightens up easily.Remove the coil spring compressors.
All that left to do is push the strut back up inside the wheel well and put one of the top nuts on loosely so that the strut is hanging there on its own and re attach the bottom of the strut to the rear of the hub.
Of course I needed to get new lower mounting bolts for mine.After going to my local Dealer they told me that they would cost £6 ea.Theres 4 of them,so after picking myself up from the floor I decided to source my own bolts.Another headache as they are M14 with a 1.25mm pitch and not easy to get hold of ,especially if you want them plated.Finally tracked some down and bought a minimum supply of 20 with nuts for £8.Happy with that as I can use the new ones for the fronts if I decide to remove them.
When I got to the stripping down stage I decided I couldn't bear to put them back on without getting the strut housings and spring powder coated.I have an account through my business with a local powder coaters so this was a no brainer.Got the struts done in white and the springs in yellow.Not sure why I chose those colours but I am happy with them.
So after putting everything back together I couldn't wait to go out for a test drive.I noticed a difference as soon as I sat in the drivers seat and started the engine,it definately felt better( or was I dreaming).Anyway on the road the back end feels like I would have expected it to when it was new.No sticking at all and feels plush even for a car with stiff suspension.
In conclusion anyone who is pissed off with there knocking or sticking rear struts should have a go at this before biting the bullet and going down the after market route.Its dirt cheap and apart from being a bit of a ball ache its very rewarding when you complete it and put it back on the road.The key is to plan everything in advance make sure you have the right tools and the rest is easy,even for non mechanically minded folk.
I hope this is of use to some people and would appreciate any feedback.
Carl.
PS I took a few more photos whilst messing around with the camera.


